Rename Windows 8 Network Connections and Remove Unused Connection Entries
All of a sudden, we see some strange things in our life. Here we are talking about Microsofts new operating system Windows 8.
In this post, we are discussing and resolving issues related to Network naming in Windows 8. Since the roll out of Windows 8, people are switching to it as soon as they can.
When we reset our modem or install Mobile Partner devices, we see the network name changes to Network 2, Network 3, and so on..
Sometimes, this becomes annoying for users and they want it to be changed to default name "Network"
With Windows 8, the option for deleting, merging, and renaming Network connection entries have removed and users are finding trouble renaming or deleting unsed Network entries.
For this you just need to locate a registry entry and you can change name or delete unused connection entries. Just follow few simple steps below.
1. Open Registry Editor by typing Regedit in Run prompt (Windows key + R key).
2. Locate to registry entry displayed in the image below.
HKEY_LOCAL_MACHINESOFTWAREMicrosoftWindowsNTCurrent VersionNetworkListProfiles
3. There you will find all network profiles and you can change or delete them as per your requirements.
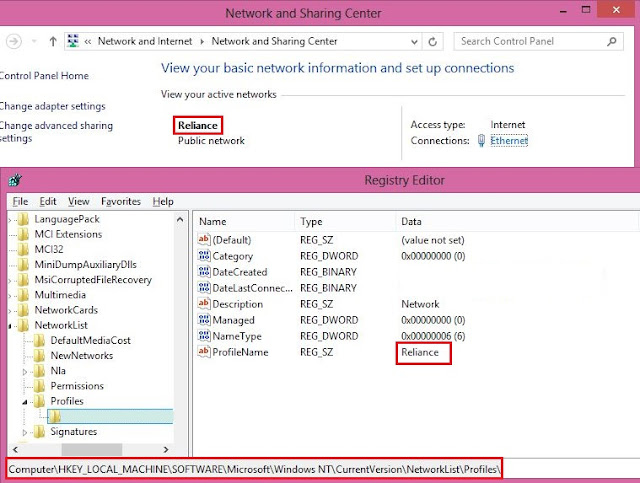
4. Just right click ProfileName and click Modify.
You are done.
Enjoy...
Comments Welcome..


